

Initial Setup
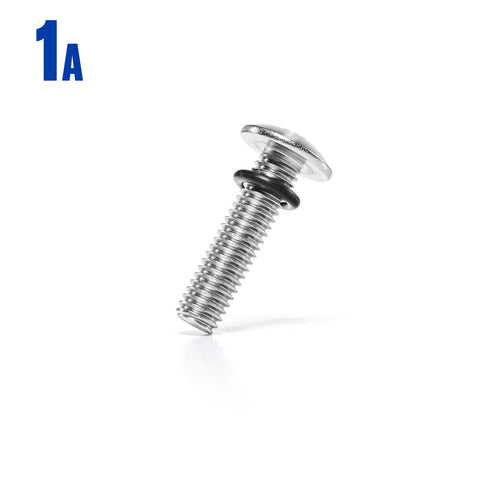
Place one rubber o-ring on each bolt (if not installed already). Install the bolts through the tumbling drum from the inside with the thread protruding out the rear of the drum.

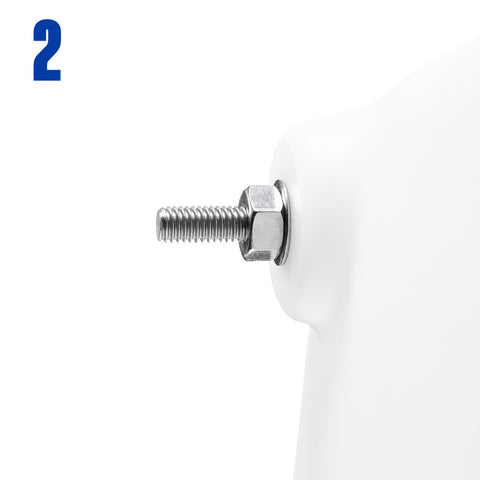
Place one flat washer onto the protruding bolt followed by a hex nut. Using a Philips head screwdriver, hold the bolt head from turning while tightening the hex nut with the supplied wrench. Over time the hex nut may loosen so be sure to check over time for any minor water leakage indicating you may need to tighten the nuts again.
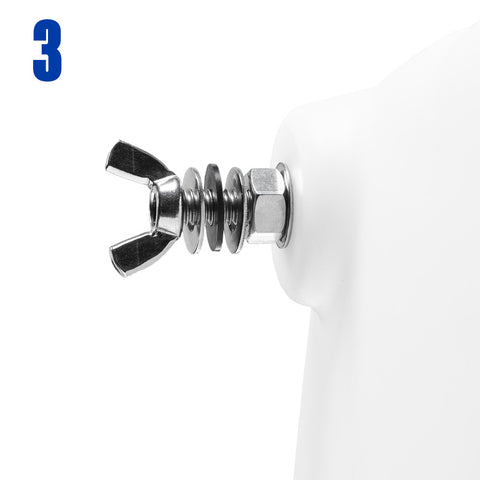
Place another flat washer onto the bolt followed by a rubber washer. The rubber washer is there to hold the washer on the bolt and prevent it from falling off. Place another flat washer on the bolt followed by the wing nut. This completes the drum assembly.
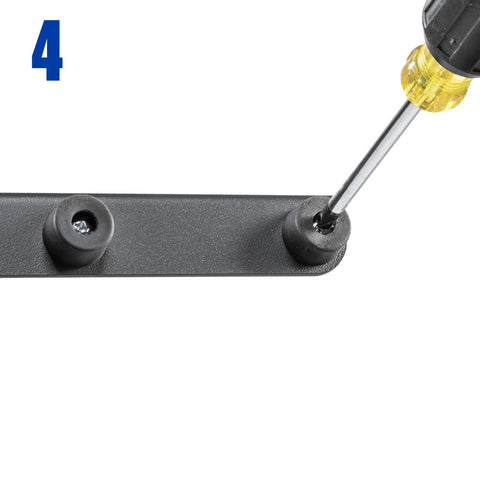
Attach the 8 rubber feet using the 10/32 screws provided. Tighten the screws until you feel firm contact with the metal washing inside the foot and make one additional turn on the screw until foot is firm. DO NOT OVER TIGHTEN
Congratulations, your tumbler is now ready for use. Please see the usage instructions to get started